Posted on April 20, 2015
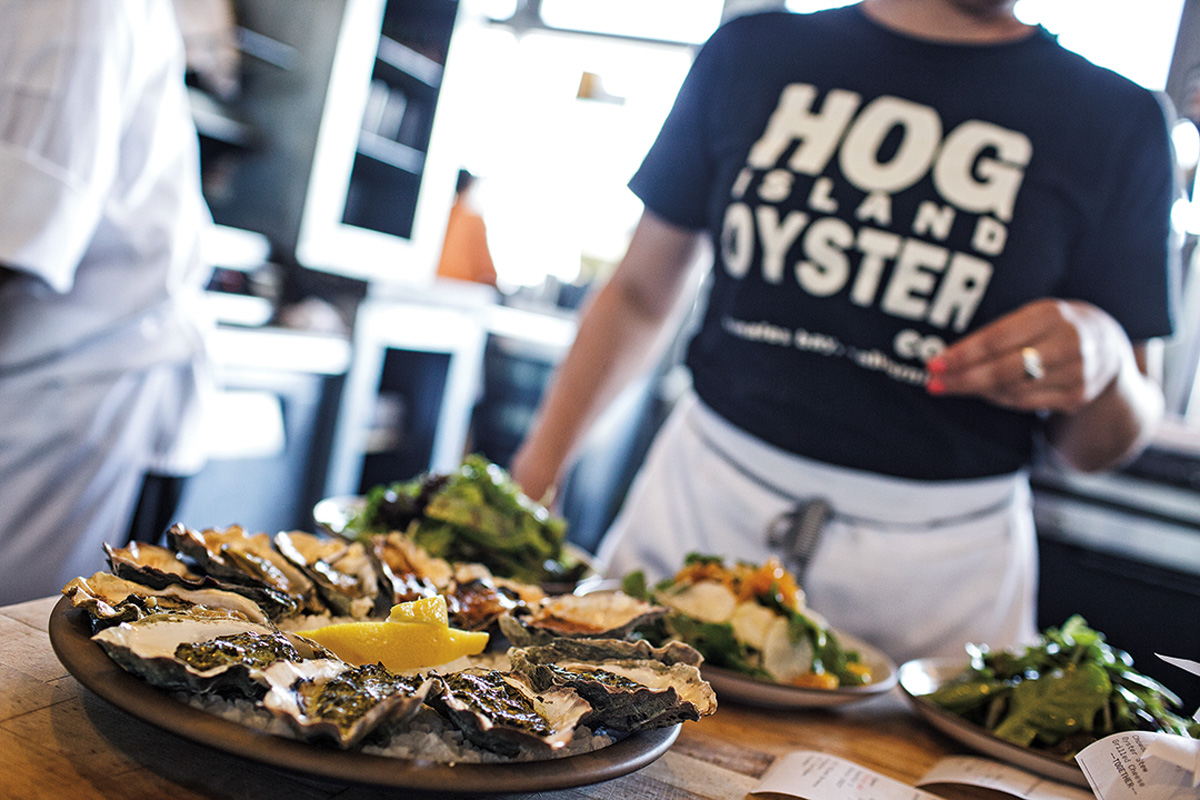
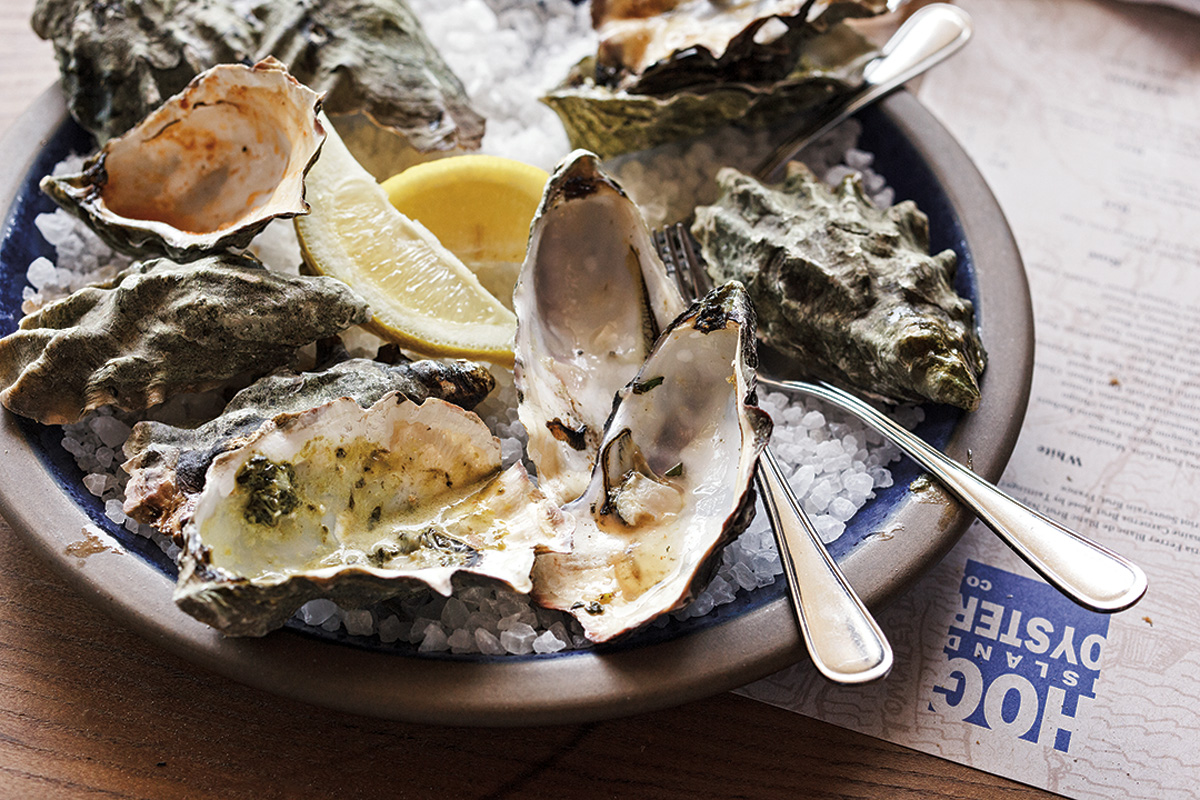
There’s a small oyster and mussel restaurant on the edge of the harbour in Falmouth, Cornwall, tucked down a narrow alleyway next to a chandlery and opposite a sailmakers. You’d never know the alley was there if you hadn’t had the occasion to go shopping for marine hardware bits in the past, and if you go more than five steps past the closed door you could easily fall into the dark waters of the harbour. It serves nothing but shellfish. They only accept cash. It’s one of the most highly regarded food destinations in south Cornwall and you have to book well in advance. A few of us got lucky last weekend and scored a cancellation, allowing us to enjoy some oysters (the final four that they had left) in celebration of a project that we completed last year for Hog Island Oyster Co in California. It set me to thinking; despite being an island nation with strong, deep, ties to the seas that surround us, we British have developed some funny attitudes to shellfish. Shortly after being commissioned to write the web copy for Hog Island’s new website I gave a friend-of-a-friend called Nick a lift to a stag party a few hours drive away. He got in the car after work on the Friday and we got talking, and within a few minutes he told me about his PhD doctorate thesis,studying consumer attitudes to shellfish consumption in the UK. The shellfish industry plays an important part of the Cornish economy, with £10 million in landings in 2013, however the vast majority of its output is shipped abroad to markets in mainland Europe. I went to Falmouth Oyster Festival at the end of 2013 as part of my initial research and of all the stalls serving food, there were only two serving oysters and they had pretty short queues. There were plenty of foodie types wandering around, but few prepared to put their money where their mouths were and actually eat oysters at an oyster festival. Why? When did the British public forget that they enjoyed shellfish? Why has Nick’s research found that so many people feel excluded from “posh” shellfish, consider it a risky choice and have little to no idea of how shellfish are cultivated and harvested? We used to eat loads of oysters in centuries past – in Victorian London oysters were viewed as far from exclusive and were more commonly consumed as a cheap source of protein amongst the poor and destitute of the capital’s East End. But then, as in many other oyster-rich regions around the world, natural resources were over-harvested and stocks collapsed. By the time you get around to the modern day, when oysters are carefully cultivated and harvested, the post war mechanisation of food production and a mid-century desire to be able to mass-produce and sell us our food frozen or in tins did the British public’s attitude to consuming raw shellfish no favours. That is changing, but slowly, and I still believe we’re an awfully long way behind mainland Europe, American and Australasia. It makes me thankful that I grew up in a house with a shucking knife in the cutlery drawer (in a special box of tools labelled “seafood and eat it”).
But I digress; prior to going off on an enormous tangent I had every intention of sharing with you some of the incredible oyster facts that I learnt whilst working on the Hog Island project. I did a lot of background reading, digging through my collection of Steinbeck for references to oysters and learning an enormous amount from Rowan Jacobsen’s incredibly well written (and witty) “A Geography of Oysters”. Did you know, for example, that oysters are one of the few organisms that actually lose the ability to move and see as they develop? Yup, as larvae, oysters are able to move (by fluttering tiny cilia hairs) and differentiate light and dark (i.e. up and down) using a primitive “eye” – both of which they immediately devolve once they have found their spot and cemented themselves to their preferred substrate. Once locked in place they have no further need for such trivial things as seeing and moving, and retaining both of these abilities simply diverts energy away from their chief tasks of eating and reproducing. The lack of such recognisable requirements for a regular life as eyes and legs should really make them modern society’s ideal food source, as there go most of our qualms about eating a sentient organism. Oysters are also very good for the marine environment: In order to eat, bivalves such as oysters filter seawater across their gills and filter out any plankton to eat. Oysters can filter as much as fifty gallons a day, so the argument for them actually improving an ecosystem is a very strong and scientifically proven one. Oyster farms are environmentally benign and are high up on most lists of sustainable seafood. Before I keep on writing and do myself out of any more work, I probably ought direct you to the Science and Policy pages of the Hog Island site, where you can read plenty more about sustainable shellfish farming and their research into ocean acidification. And if you’re hungry to get more brass tacks on bivalves then check out “A Geography of Oysters”.
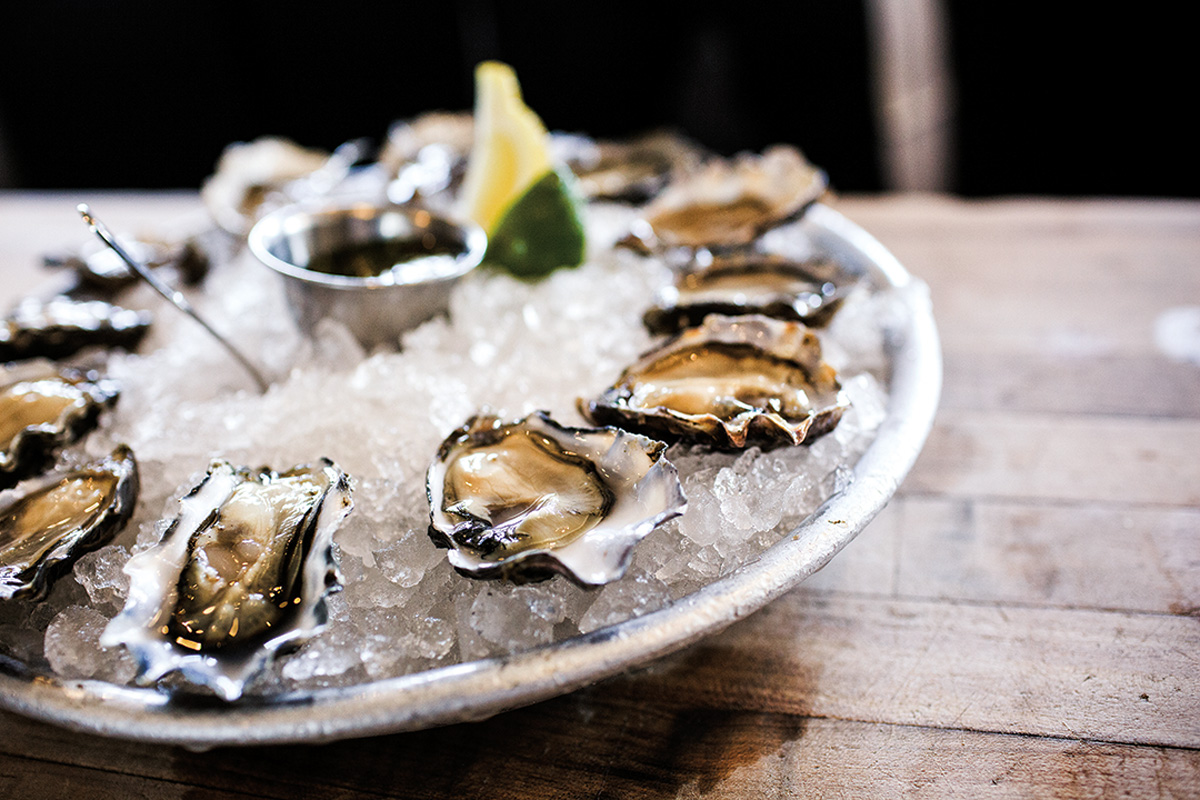
I hope that the next time you have the opportunity to hold an oyster up to your lips and tip your head back you recall this post and choose to do so. I certainly will, if for no other reason than because they TASTE OF THE SEA, and I bloody love the sea.
Posted on April 20, 2015

Thomas Edward Blake is one of the most important figures in surfing, and probably the most important single person in the history of wooden surfboards. Whilst Polynesians had been riding waves on wooden surfboards for hundreds of years, it was Blake whose experiments and innovations through the 1920s and 30s led to lighter paddleboards and surfboards, alternative (and widely accessible) construction techniques, the introduction of the fin and a rudimentary leash. Esteemed surf writer Drew Kampion credited Blake with transforming surfing from a Polynesian curiosity into a 20th century lifestyle, and rightly so.
In 1927, the same year that he pioneered surfing at Malibu, California with Sam Reid, Tom Blake built a replica Olo surfboard in Hawaii. The board was fifteen foot long, and would’ve been enormously heavy (somewhere in the region of 150lbs), so he drilled hundreds of holes through the deck to remove excess weight and sealed the ends of the holes with a wooden veneer. The reduced weight helped Tom to win many paddleboard races, so he continued to experiment with lighter boards. He had some success chambering a solid board by cutting it into strips, carving out internal sections and then putting it all back together, before moving onto constructing surfboards from multiple component parts rather than shaping them from a solid timber. Blake started to build his paddleboards using a skin and frame technique similar to that used in the construction of aircraft wings, which made them significantly lighter than the solid plank boards most widely used at the time weighing as little as 40lbs. Whilst Blake’s boards had solid wood, straight-edged rails, planked or plywood decks and were held together with brass screws and pins sealed (caulked) with black pitch, construction techniques for wooden surfboards have improved in the intervening 84 years since he patented the design in 1931. Nevertheless, the original design was used for decades on beaches around the world as a lifeguard rescue board, and produced commercially by several manufacturers (Thomas Rogers Company of Venice, CA, the Los Angeles Ladder Company and Catalina Equipment Company).

It was in 1935, however, that Tom Blake made his most significant contribution to surfing. In an attempt to provide some directional stability whilst surfing, he attached an aluminium skeg salvaged from a speedboat onto the bottom of his cedar surfboard and encased it in a thin layer of wood for protection. At a foot long and 4 inches high, many surfers would struggle to recognise it as a fin, however it was this that allowed surfers to ride at a tighter angle across peeling waves and to begin to effectively turn surfboards. Tom Blake’s inquisitive mind and relentless quest to improve the performance of his equipment changed surfing forever. It has been said that if Duke Kahanamoku was the father of modern surfing then Tom Blake was its inventor, and rightly so. Modern surfers certainly owe him a great debt of gratitude, so why not say a little thank you to Tom next time you lean into a turn.

“Along the shore I wander, free,
A beach comber at Waikiki,
Where time worn souls who seek in vain,
Hearts ease, in vagrant, wondering train.
A beach comber from choice, am I,
Content to let the world drift by,
Its strife and envy, pomp and pride,
I’ve tasted, and am satisfied.”
Thomas Edward Blake
1902-1994
For a more thorough biography please take a look at the fantastic Encyclopaedia of Surfing or theLegendary Surfers website.
All images reproduced from the Surfing Heritage Foundation.
Posted on April 20, 2015

The depths of winter, for a surfer in high latitudes, can be like an enormous game of meteorological hide and seek. Rainbows abound, but the proverbial pot of gold is always retreating over the brow of the next hill. Swells are often raw and powerful, generated by storm systems that follow closely behind and move over the coast bringing strong winds that swing on a dime. The clock is there to race as daylight hours are limited and large tides can cause good sand banks and reefs to turn on and off within an hour. It’s all too easy to spend hours on end driving country lanes and slip-sliding down muddy tracks to check obscure little coves only to find out that you’ve missed the best of it someplace else. It can feel like you’re spending all of your precious free time chasing unicorns – you know that you’ll never get one, but it’s worth it just to catch a glimpse every now and then.
Posted on April 20, 2015
At the risk of being labelled some sort of
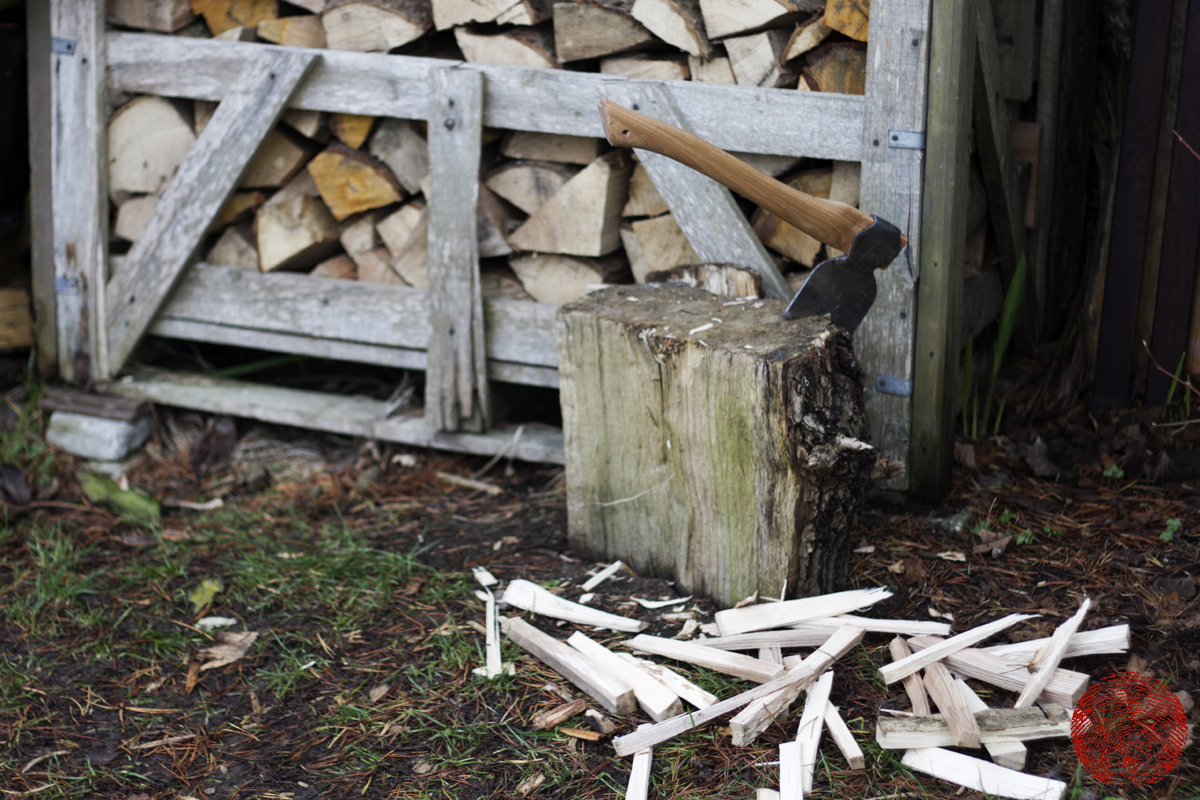
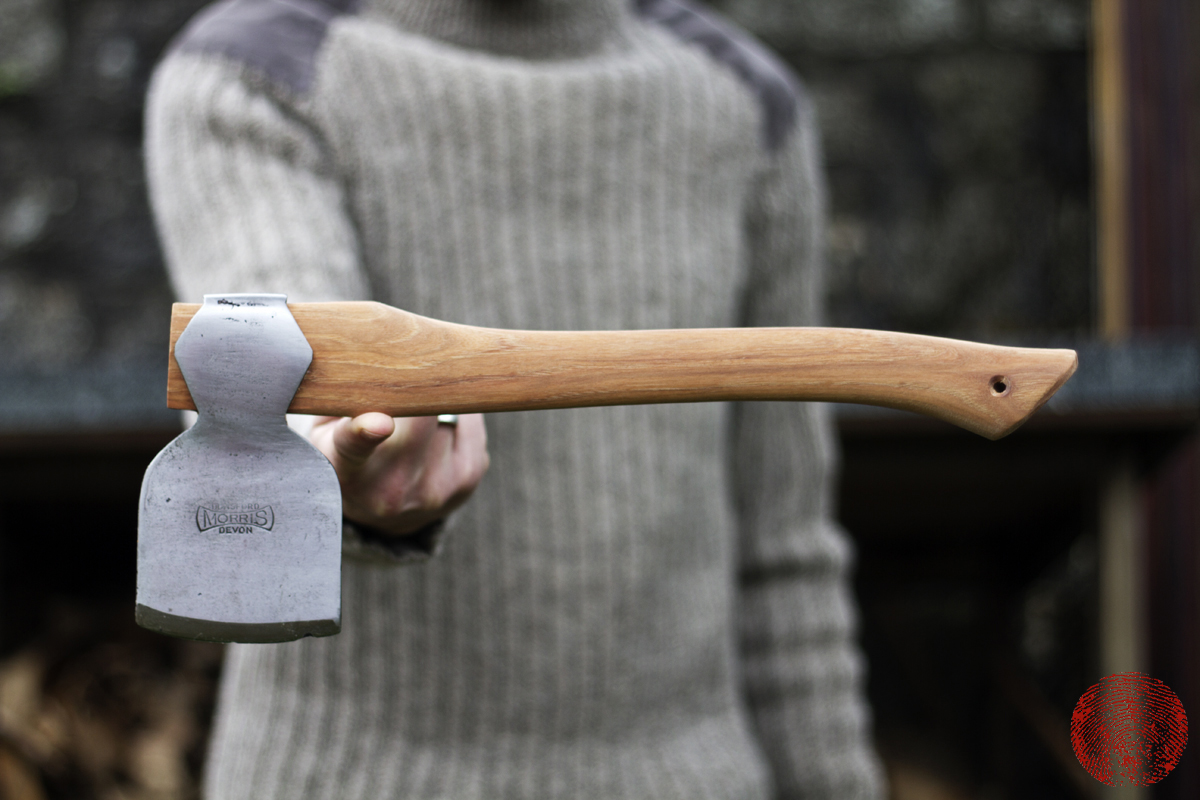
lumbersexual, I am going to share with you one of my most recently completed winter projects: the restoration of a vintage forest axe.
Whilst it could definitely be viewed as being a bit “bandwagon”, this was a fairly urgent project for me as I split kindling on an almost daily basis throughout the winter months. Yup, it’s not for hanging on a wall but for facilitating the fire that heats our home. I own a beautiful felling axe (given as a gift) but it is enormous and designed to do exactly as its name implies: fell trees. I can split large logs with this but any attempt to knock down kindling is an exercise in risking my fingers, so I needed a smaller axe. My options were to buy a cheap hatchet from the hardware store (crude, unrefined and often with an ugly hi-vis orange plastic handle) or pick up an old axe from a second-hand store and restore it. I chose the second option. Here’s how it went down:
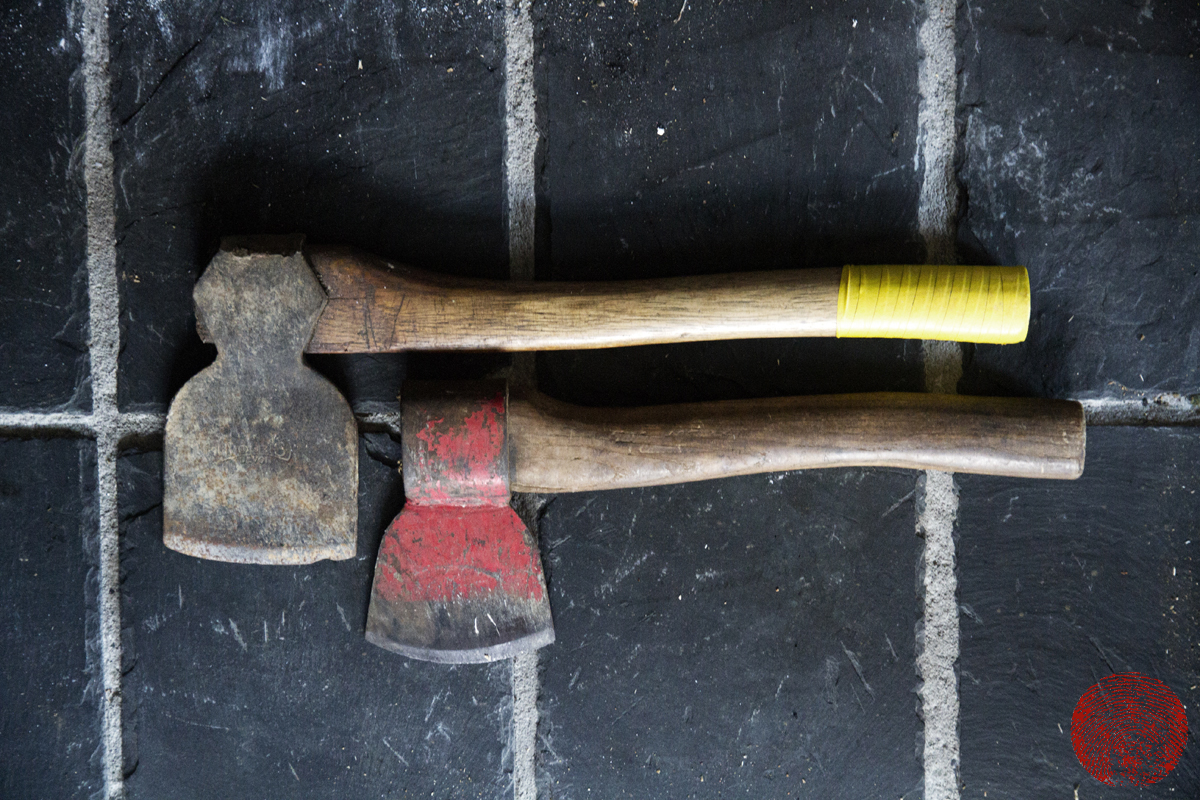
I struck gold early on and found these two dilapidated old axes at a house clearance store. I paid £6 for the two of them, which is cheaper than one new axe. I decided to restore the top one first as the red axe below it was sharper and could be used cautiously whilst I worked on its big brother. Step one is to get rid of the helve (handle) by cutting it off just below the axe head, removing the metal wedge if there is one and then drilling out some of the wood and knocking the helve out of the eye of the head. On some axes the head will practically fall off the helve, whilst others might be stuck tight.
Take the rusty, tarnished old axe head and place it in a vinegar bath overnight. Use distilled malt vinegar (the clear stuff) that you can buy from most supermarkets for about £1 and place it in a container with a lid so that the head is just covered. Put the lid on so that it doesn’t make the room smell, and leave it for 12-24 hours so that the acetic acid can break down the oxidisation.
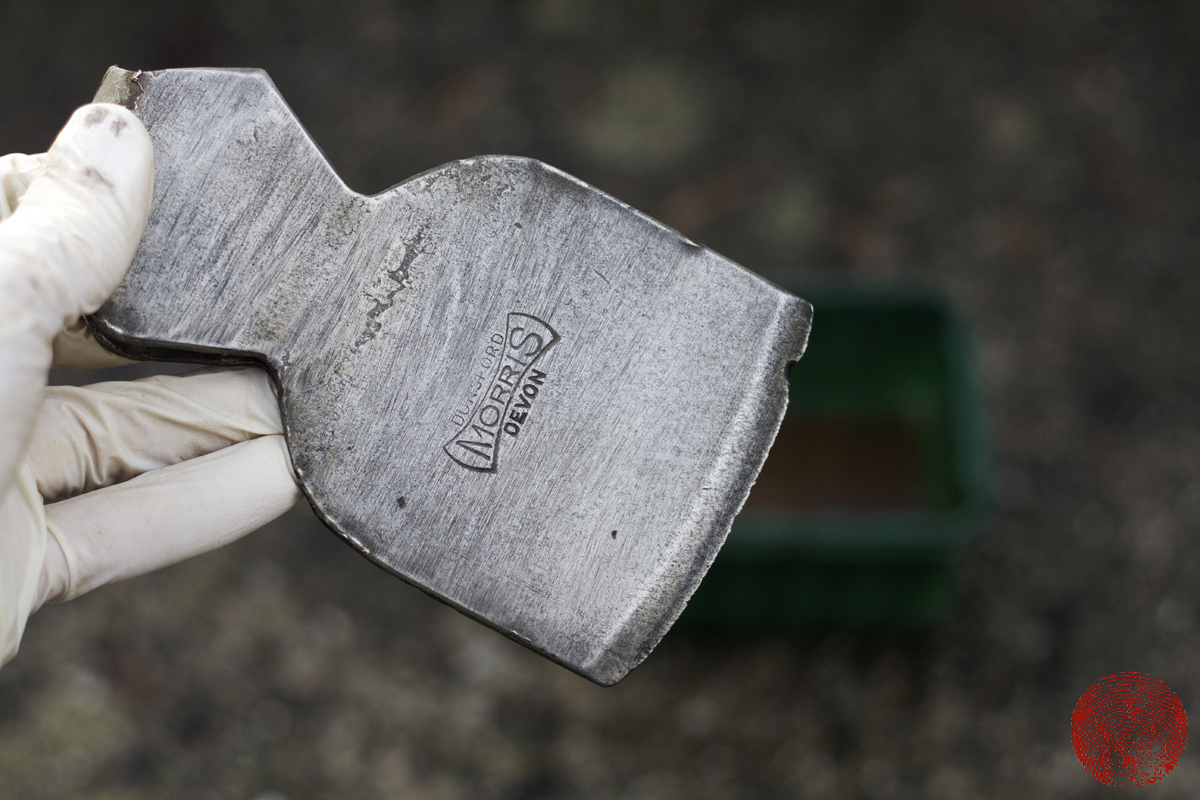
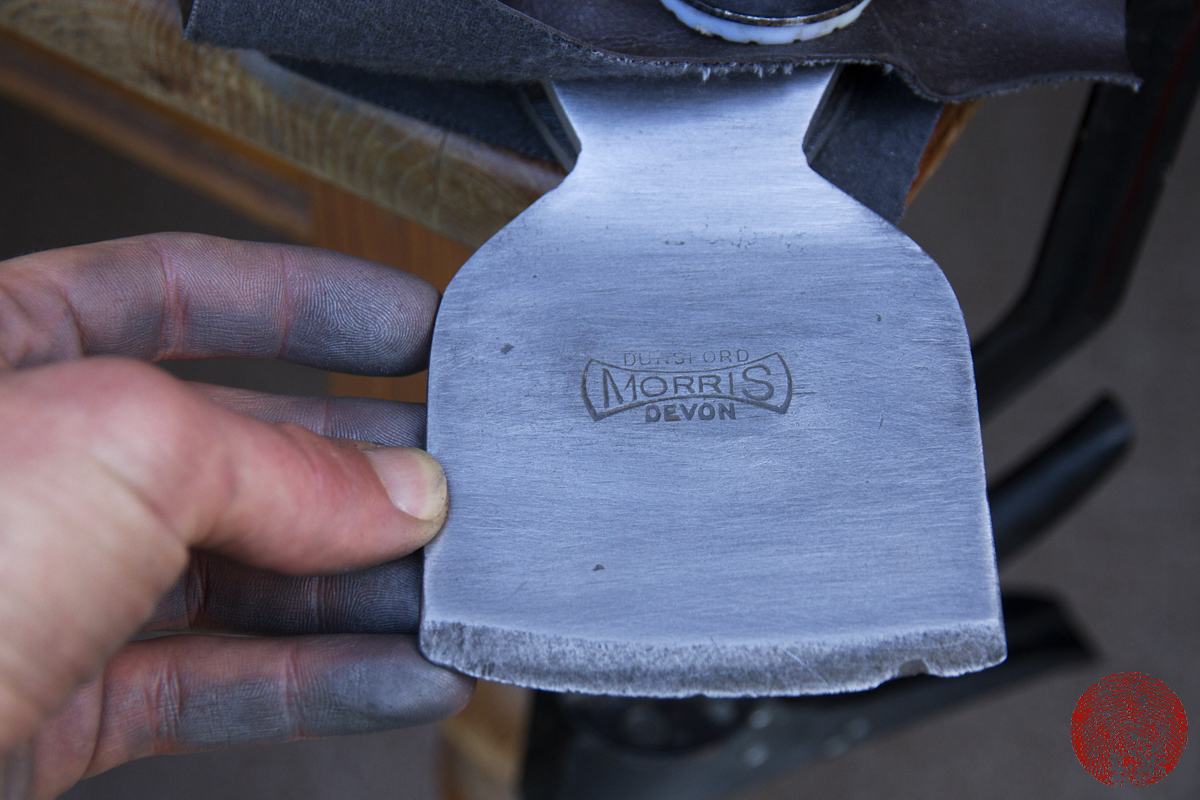
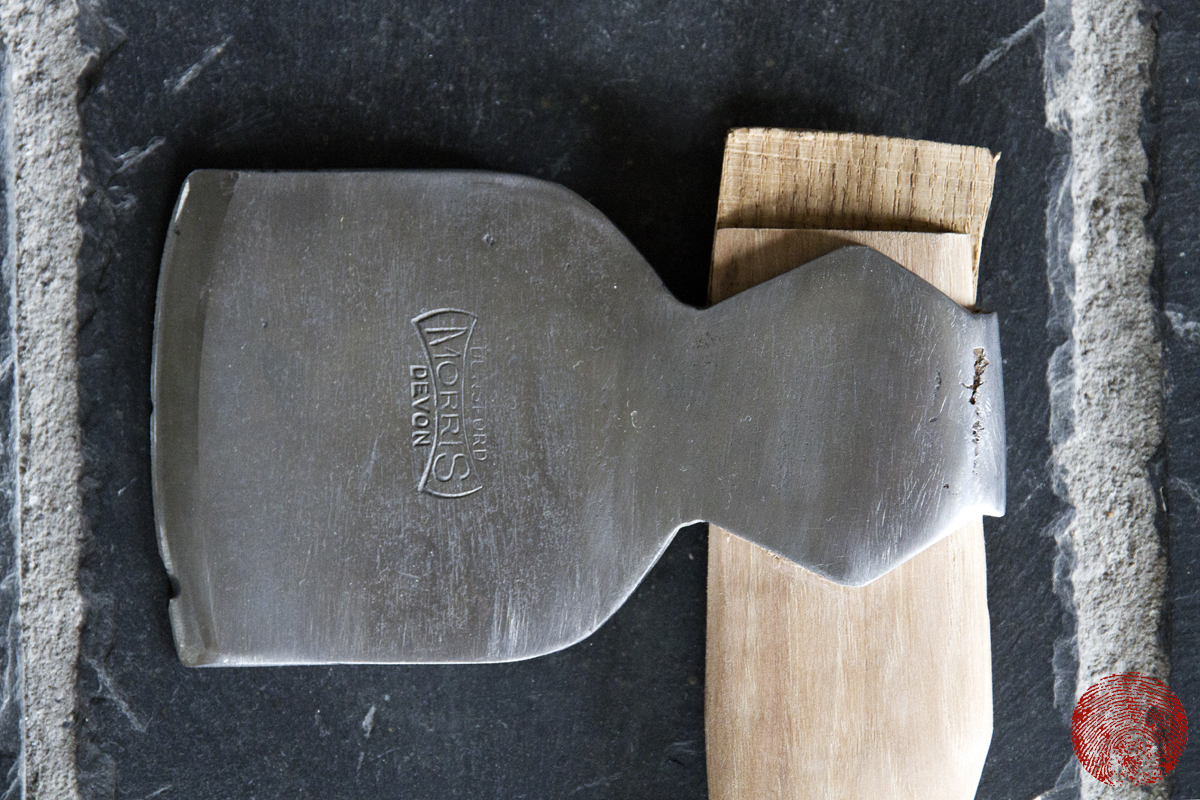
That done, put on some rubber gloves and use your thumb or fingers to rub the rust off the axe head. You might want or need to give the axe a light sand with 120 grit abrasive paper and put it back in the vinegar for another few hours to get the best results. My vinegar bath revealed a maker’s mark – it was forged by
A Morris and Sons of Dunsford, Devon. They’ve been making
billhooks, slashers and edge tools since the 1800s and continue to do so, and have obviously produced axes in the past.
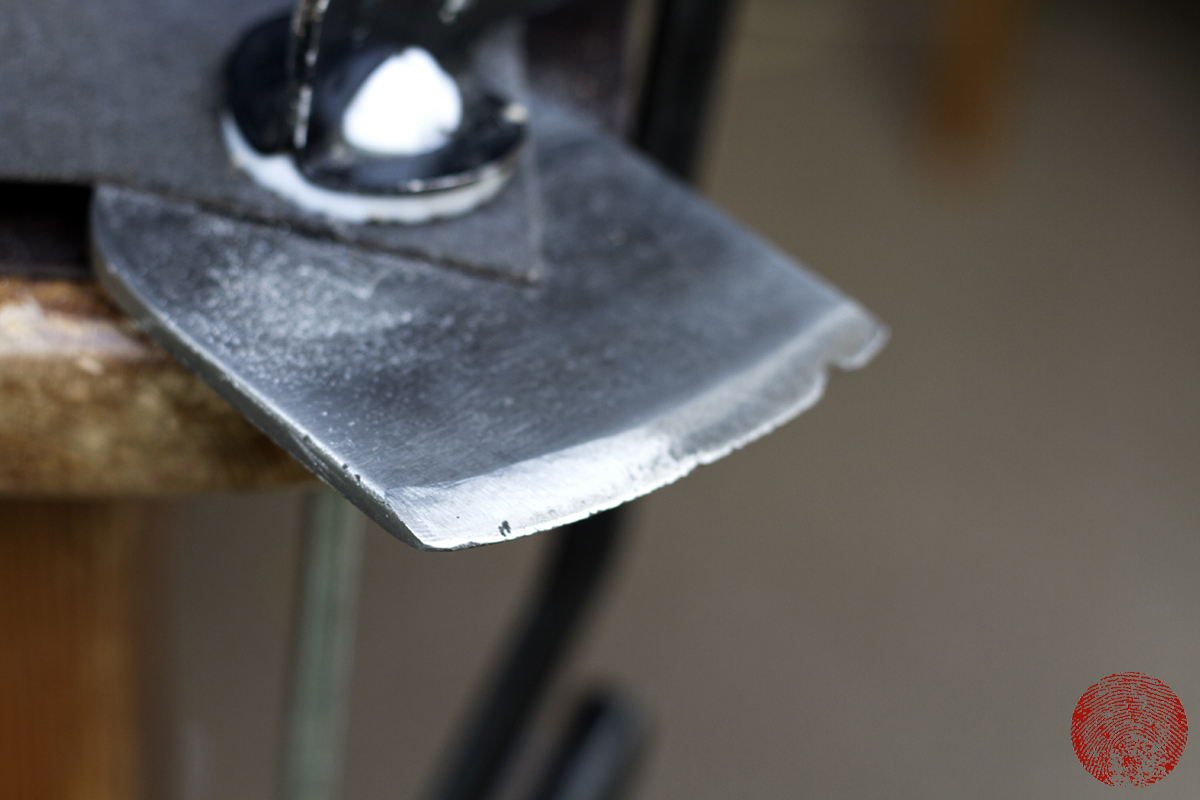
It will also reveal the
hamon line along the bit – the line of distinction between the (darker) hardened steel of the bit and the (lighter) softer backing steel of the ret of the axe head. As you can see in the image above, the hamon line on my axe tapers off towards the bottom (the toe) which suggests that at some point the bit has been re-shaped.
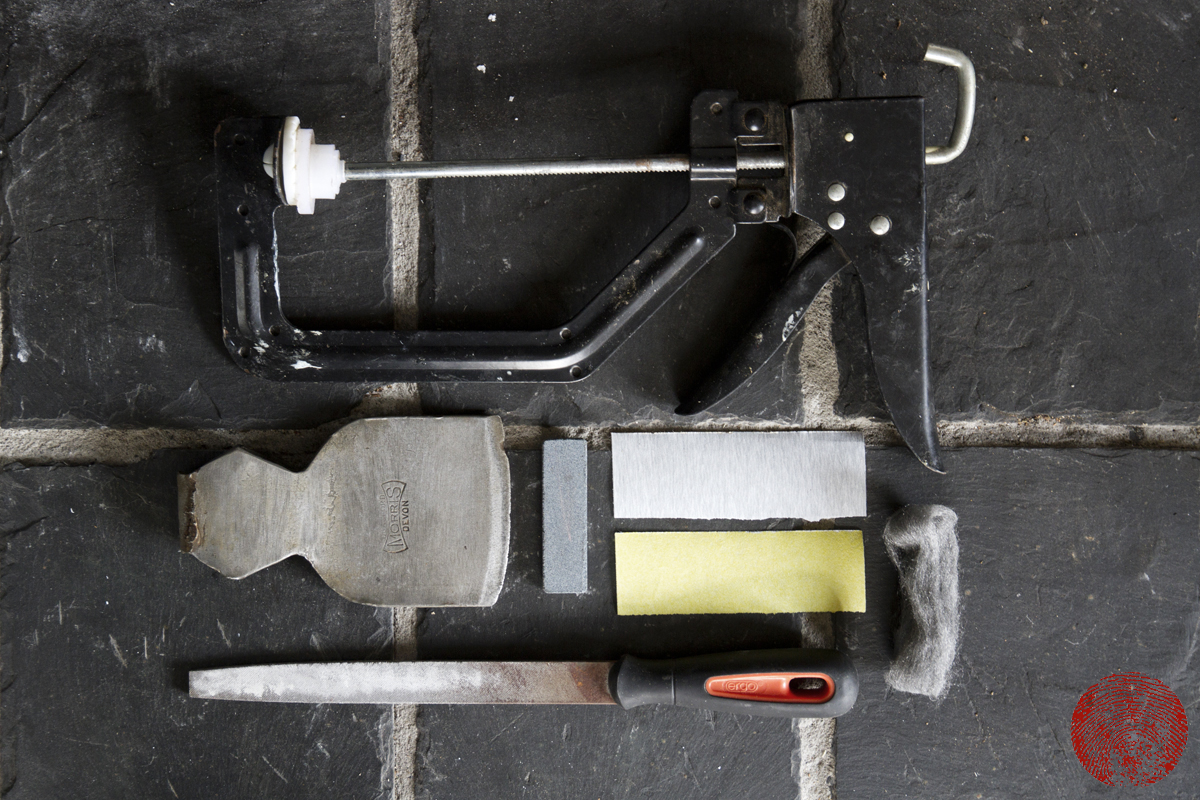
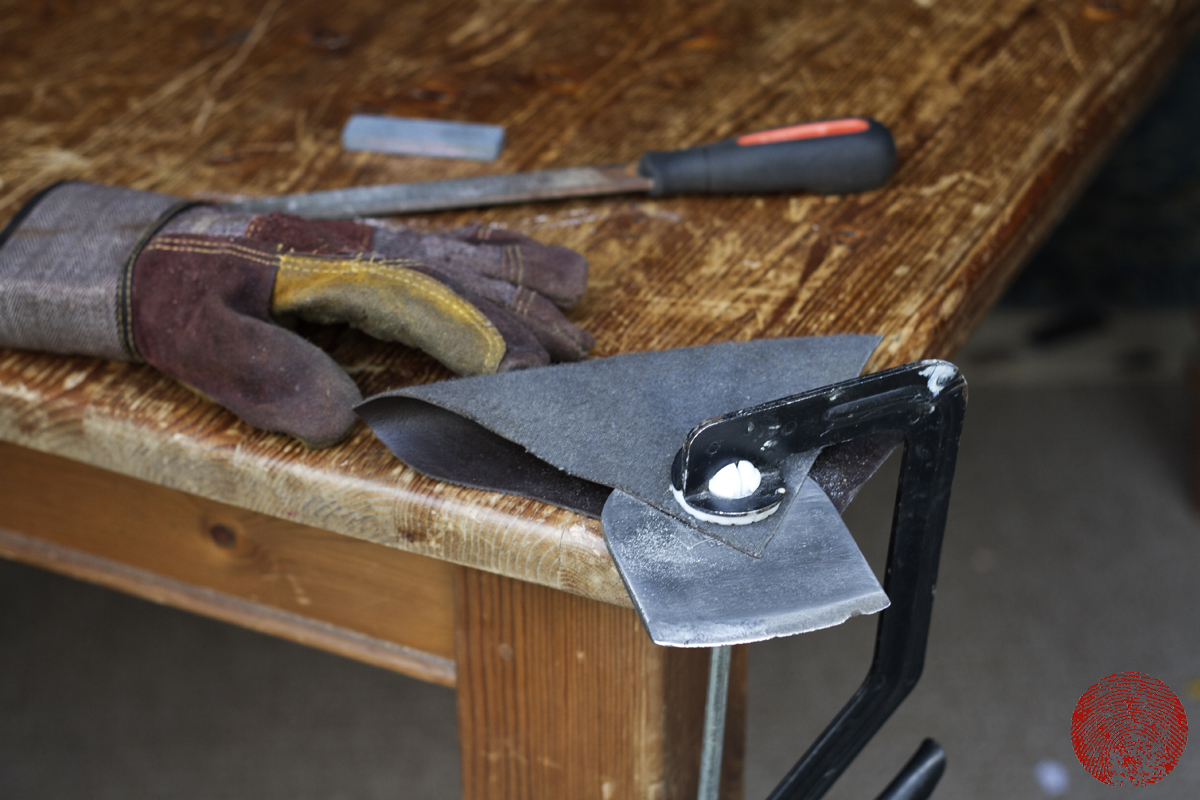
Gather together the following things and if you don’t have a workbench then commandeer the corner of a table (preferably outside): A clamp, a scrap of leather, a flat bastard-cut or second-cut file, various grades of abrasive paper (120, 240 and upwards), wire wool and a sharpening stone. Clamp the axe head to your work surface, using the leather to both hold and protect it. Use the file and then ascending grades of abrasive paper and wire wool to clean up the main body of the head, always working in the same direction to remove scratches. Don’t worry about going anywhere near the “sharp” bit. Your head may have a load of marks that you can’t reasonably remove – these are known as “history marks” and, unless you want to erase the character of your axe then you’re best to just leave them be. It’s best to complete this stage the laborious way, by hand, as using power tools (in particular a grinder) can heat up the axe head and damage the temper of the axe.
The next step is to make your shiny axe a sharp axe. Wear a thick work or gardening glove when you do this stage as your sharpening tool and therefore the fingers holding it are moving towards the sharp edge – and you want to keep them intact and on the ends of your hands.
Because my bit was good and blunt, with a few nicks and chips taken out of it, I had a fair bit of work to do to sharpen it. All of the sharpening strokes taken go into the blade, rather than down the length of it. Hold the file with a hand at either end (to guide it) and push the file into the bit, rounding out the top of the stroke as you come towards the end of the file. As you restore the sharp edge, you can move onto a sharpening stone or diamond file if you have one. Sharpening an axe will take time and patience as the part that you are trying to remove material from (to get an edge) is hardened steel. It should end up looking polished as one part is starting to in the image below.
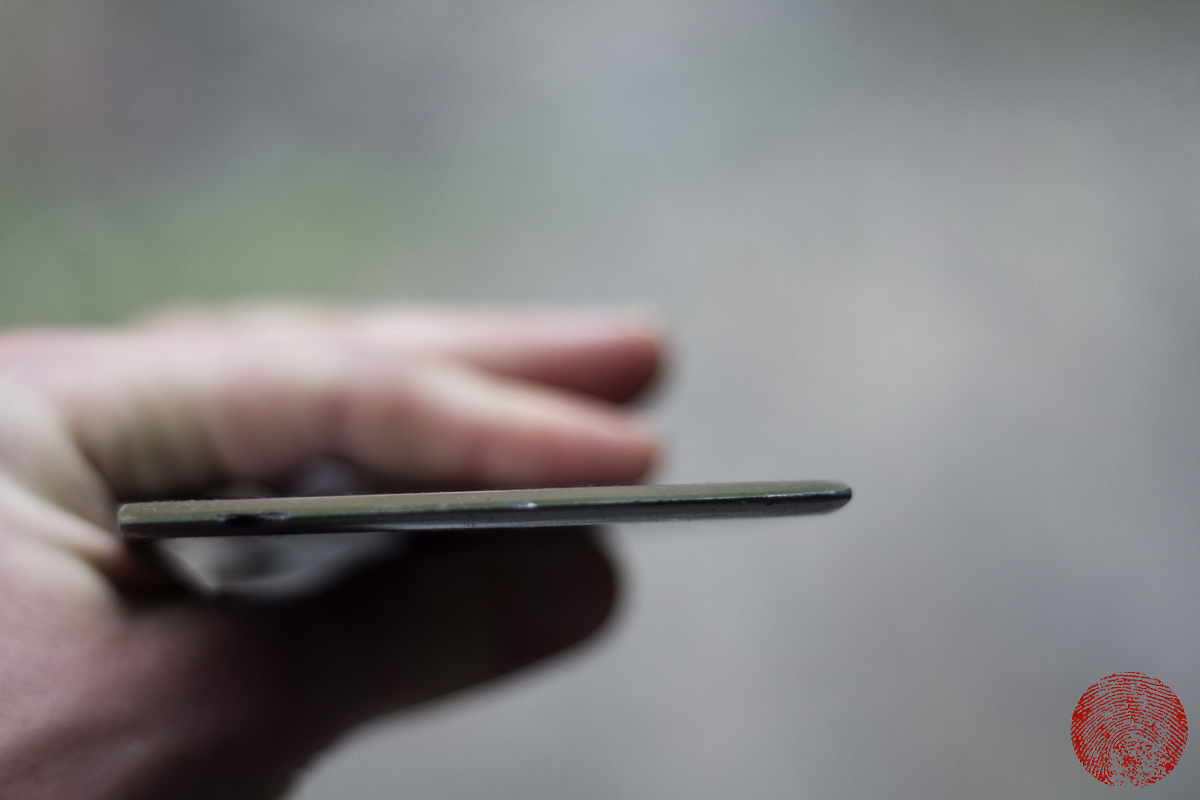
You will need to sharpen both sides of the bit equally, and keep checking it as when you sharpen one side you cause a burr of material on the other. You may also leave dull spots (called candles) on the very tip of the axe. Keep checking and continue sharpening to remove them.
For final sharpening I cheated a bit and asked a friend to finish my axe head off on a powered whetstone sharpening/honing machine at his work. If you have this luxury then it will certainly ensure that you achieve a sharper axe a bit faster.
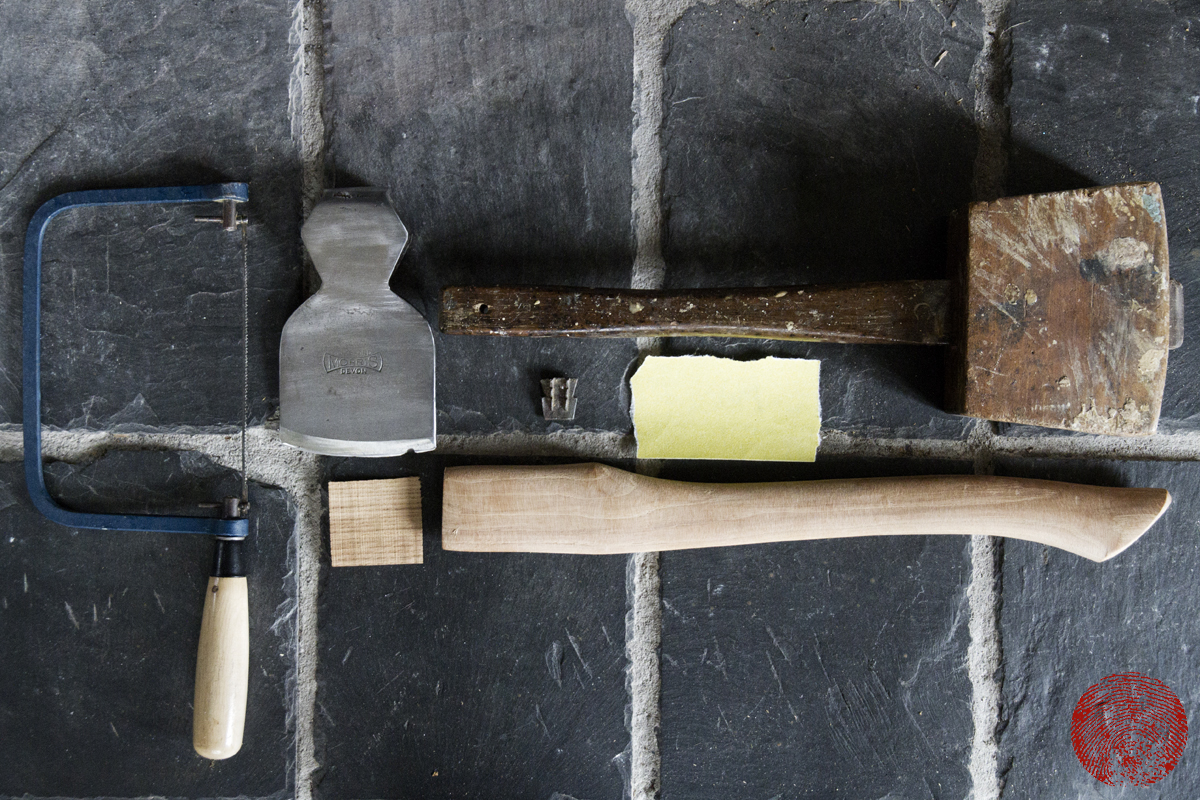
Once you’ve restored the head of the axe to something like it’s former glory, you need to hang it (put a helve/handle on). You’ll need a new handle, a hardwood wedge to fit, possibly a metal wedge, a mallet, coping saw and 120 grit abrasive paper. New handles, made from hickory for it’s positive properties of shock absorbency and strength) are available at a lot of hardware stores, but often they are just as ugly as the ones on the axes that they sell (and I chose not to buy). You might need to shop around a bit to find one with nice straight grain that is the right length. Generally speaking, the larger the axe head, the larger (longer) the helve. I found a 16′ helve which looked about right for my axe head. I took the head into the store with me so that I could check that it would fit.

To hang the axe, first push the helve as far into the eye of the axe head as it will go, which probably won’t be very far. Holding the end of the helve so that the head is hanging down, give it a couple of whacks with a mallet. You’d expect this impact to cause the axe head to fall off the end of the helve onto the floor (you’d be forgiven for wearing a tough pair of boots), but what it actually does is push the helve further into the eye. Then remove the head (a couple of taps on the bottom of the head and a bit of wiggling should do it) and look at where there are marks or shaved areas left by the head. Use a file, electric sander or sanding block to remove material from these tight spots, and try again. Keep repeating this process until the head of the axe sits tightly low enough on the helve.
If you end up with a fair bit of the helve protruding above the head of the axe, then trim it down to about half an inch (15mm). Take your hardwood wedge and, with a little bit of glue applied to the leading edge to ensure that it holds, drive it into the kerf slot in the top of the helve. You want it to go as deep as possible so err on the side of a thinner wedge, whittling yours down if necessary.
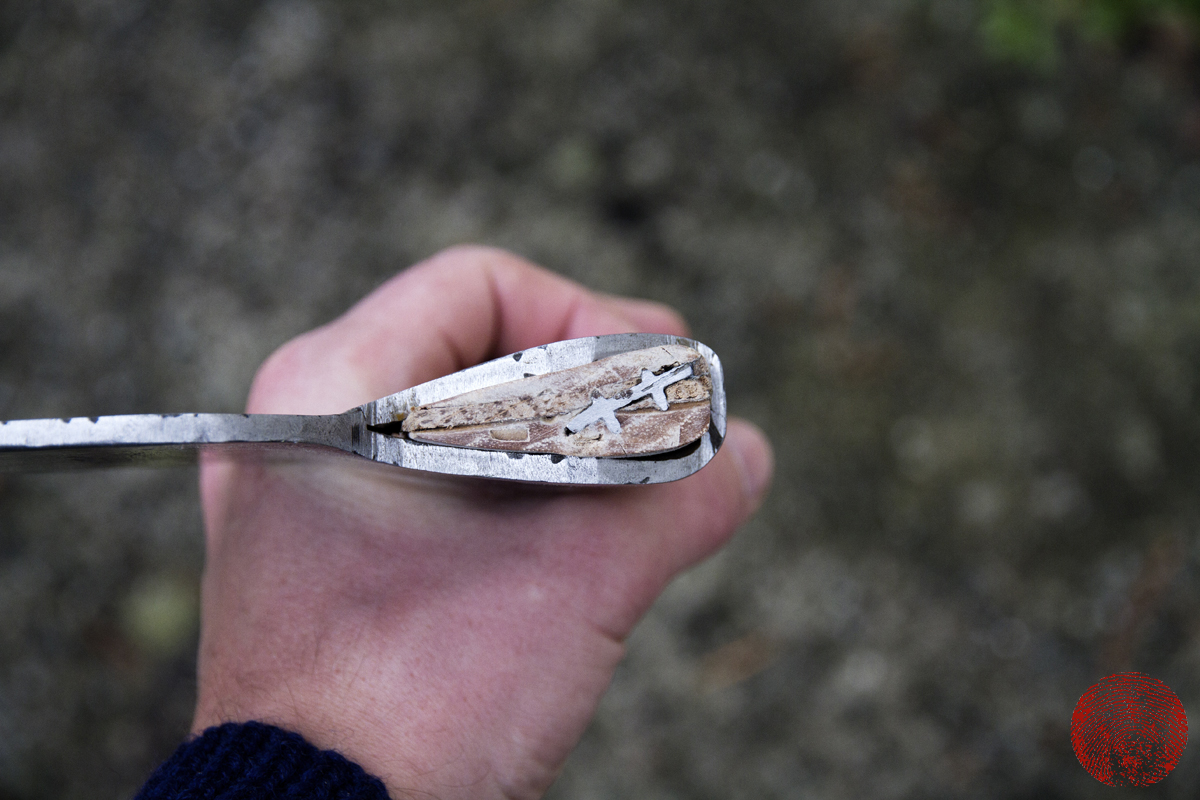
Most axes also have a secondary metal wedge driven in perpendicular to the first hardwood wedge. I rescued the metal wedge from the old helve and carefully drove that in too. Be careful not to split the helve, though, after all that work. File and sand down the top so that it all looks neat and tidy, and give the handle a rub down with some 120 and 300 so that it’s nice and smooth. I also drilled and countersunk a hole down at the bottom of my helve so that I have the option of hanging the axe up. The final stage is to oil the axe head and helve to protect them from corrosion and to provide a nice surface finish. Linseed oil is probably the most commonly used and readily available, and can be used on both the steel and wooden elements of your axe to protect it. Wearing gloves, apply some using a clean rag and being sure to apply extra to the end grain at either end of the helve as these will soak up a bit more. Leave the axe hanging for 24 hours, then wipe off any excess with a clean rag. If you have the patience to give it a light sanding and apply a second coat, that would be best. If you want to paint the helve to make it look more expensive than it really is, then do so before you oil it.
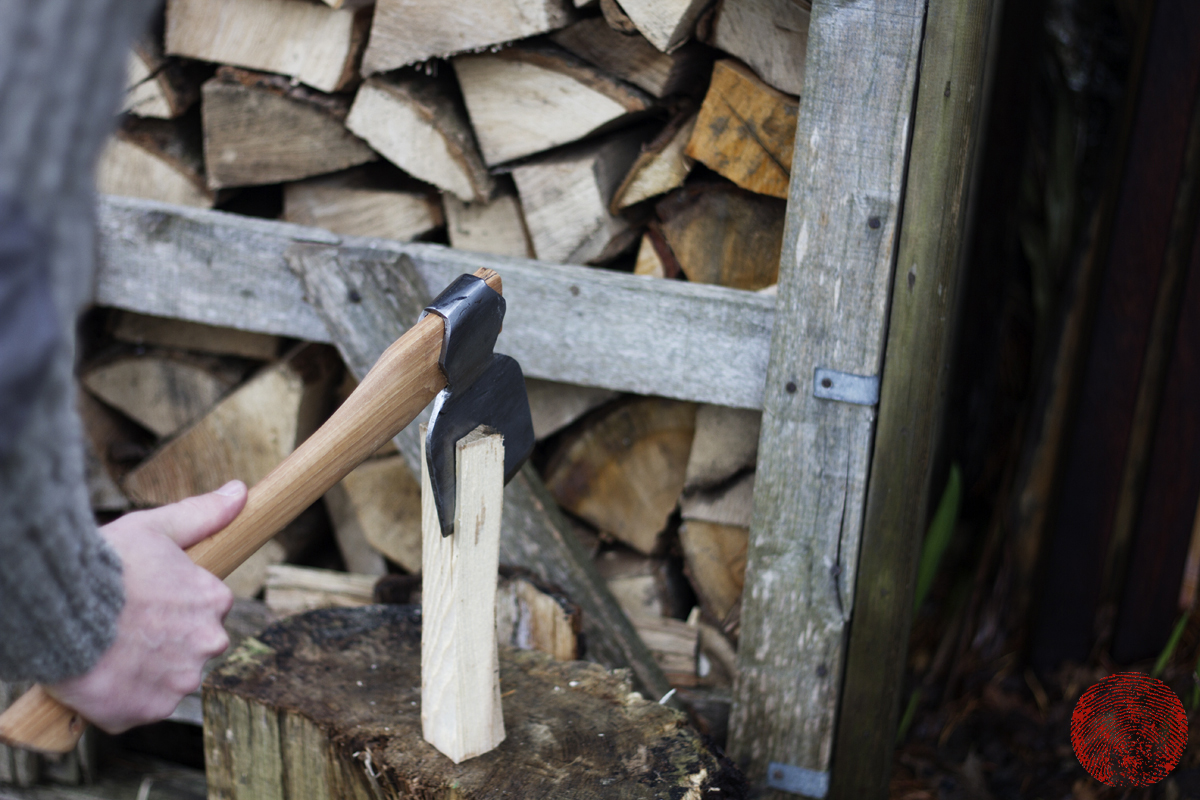
Once that’s all done, you’re ready to use it and start splitting kindling. Watch your fingers, mind, and don’t be too precious about your new axe – it’s a tool with a purpose, after all.